Thursday, December 22, 2016

Merry Christmas!

Christmas Wrap Up

I love wrapping presents. There are so many beautiful papers.  But I also love beautiful fabric, especially the Christmas prints.   So this year I decided, why not make reusable Christmas wrap?

My family has gotten to the point where they prefer gift cards.  While that is easy for me to get them exactly what they want, I find it a bit boring.  So to make it a bit more interesting for me, I have tried to come up with a different packages for housing gift cards.  A crocheted snowman surrounded a gift card several years ago. But mostly simple little boxes, wrapped with pretty paper with ribbons and bows.

This year I decided to make an origami triangular box. I made it from simple cotton fabric printed with poinsettias.  I found the pattern on the Shabby Fabrics YouTube channel.  The instructions were easy to follow and the pattern worked out perfectly. Although it was a bit large for two gift cards, I took up the extra space with some sweet candies and chocolates.

A lined drawstring bag works perfectly for those odd shaped items, or items without a box.  My niece asked for clothes for her two little girls. Another niece asked for only money for her one-year-old and her savings account. I chose some snowman printed cotton fabric to make drawstring bags for each child. They went together quickly and easily and turned out pretty cute.  Another bag made larger from a winter print, wrapped a shirt for the brother in law. Smaller ones fit DVDs. The possibilities are endless.


Then the question was, how do I label the bag?  Standard paper sticky tags do not work very well on fabric.  Taking some scrap fabric and Wonder-Under Fusible Web, I fused two scraps wrong sides together. Cutting a mailing label smaller than the decorative traditional label, I added some extra fabric glue and attached it to the fabric scrap. This paper will help hold traditional label better.  I then cut circles for the bags and a triangle for the origami box. Using a hole punch, I made a hole in the top and attached a length of red ribbon. This year's label can be removed or a new label placed on top for the next recipient.

May God bless you and your during this holiday season and throughout the new year!!


Thursday, November 10, 2016

One, Two, Three, Purl

Socks, socks, socks!


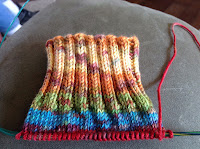
I had a new fascination with knitting socks this summer. Small and portable projects, socks can be mindless, keep my hands busy during TV, relaxing and useful. My first pair was a simple Plain Jane/vanilla pattern.  I followed a tutorial by Kelley of Knit Picks. Her 13 part YouTube video was excellent for the first time sock!

First Ever Knitted Sock

Your options are endless. The five main components of the sock can be styled to your liking and still cover your foot! The top of the sock can have a cuff, or not. Ribbed cuffs can be 2 x 2, 1 x 3, 1 x 1, twisted or any combination.  My favorite is the 2x2.


The leg can be plain or patterned. I found the patterned yarn, whether it is self striping or variegated, is better suited to the stockinette. Solid and tonal colors show the pattern of stitching, like cables and purls.  This is true of any project, not just socks. Why use the effort of an intricate stitching pattern, if your hard work is lost in the yarn color changes or texture?

Fish Lips Kiss Heel
Heels come in several styles. The first, and maybe the hardest, I learned was the traditional heel flap, turn and gusset. Then onto the Fish Lips Kiss heel pattern. This is a short row version that has become very popular. As of this writing, I have not tried the German short rows or the afterthought heel, but I will eventually.

Hermione's Everyday Sock
Vanilla Latte Socks
As with the leg, the stitch pattern can be continued down the top of the foot.  Stockinette is nearly always recommended for the bottom of the foot, but you do have the option to knit plain on the top as well.  Toes have options, too.  Round or square.

Needles and method are another choice.  Do you like to knit flat and seam, or knit in the round?  Do you knit on double pointed needles or circulars? Do you want to knit one sock at a time, or knit two at once?  Magic loop or 9” circulars?

Too many decisions?  Some are no brainers because of your experience.  Some decisions come from trying new techniques and experimentation. The best part of the whole process is that you choose!  Whatever feels best and knits well. Knitting is a fun hobby and the fabric it produces can be conservative or wild and crazy. Enjoy the process!


Wednesday, September 28, 2016

Fabric Stands for my Tech

Fabric Stands for my Tech

I was becoming increasingly frustrated with the stands I had for my iPad. The case I bought for the tablet is great for protection, but not so great for standing it on edge. Since I spend a great deal of time with it propped up watching videos or listening to podcasts, I needed something that was more stable. I tried using a plate stand, but it was forever catching on the case for the iPad.  Each time I went to use the tablet, the stand toppled over.  It was a balancing act just to put it back in the stand as well.

I had seen in my internet travels where you could make your own pillow stand with just a couple of seams, fiberfill and a bit of a weight.  After reviewing several patterns, I decided on the Nancy Zieman version with an alteration or two.

I practiced on the smaller version first. My phone served as the Guinea pig.  It is a simple design and took no time at all.

For the weighted bottom, I used rice. Dry beans, small marbles, aquarium stones, pea gravel, etc would work just as well to give it stability.  I made a small inner bag to hold the rice and stuffed the remaining pillow with fiberfill.


Nancy added cording to the base to keep the tech item from sliding. Since there was not a piece to be found in my inventory, I made a half inch channel for the item to sit in. I then filled to the end of the unit with more fiberfill and sealed the edge.

For the larger version, within the half inch channel is a kabob skewer, cut to width and no pointy end.  Just an experiment, but it seems to add more staying power, since I didn't have the cording.

Don't be afraid to change things around.  Patterns are blueprints, as well as guidelines. You're the designer, after all. Have fun with it!